


Our 2013 Advent & Christmas theme was “Heaven and Nature Sing” and, to help integrate that theme into our worship setting, the congregation made ornaments for the large tree in the sanctuary using natural materials. Our family had an abundance of acorns gathered from the church playground by my preschool age daughters who spent the fall pretending to be “squirrels” at recess. To these we added feathers, pinecones, sprigs of artificial evergreen snipped from an old Christmas garland, and several bags of potpourri upcycled from the fall window decorations in the sanctuary.
A word about acorns. Before you use them in crafts or decor, you must make sure to kill off the little critters that can live inside the acorns. Who knew this was a thing? But believe me, you do not want worms hatching out of the acorns on your Christmas tree while the children’s choir is singing “Silent Night, ” because the night will no longer be silent. During her squirrel phase in the fall, one of our daughters would routinely carry around a pocketful of acorns. We were in the car, and from the backseat we heard squealing and shouts of “It’s hatching!” “It’s Little Squishy!” A small white worm was hatching from one of the acorns. I honestly can not remember what happened to Little Squishy during the remainder of the car ride, but now I always remember to pre-bake the acorns I use in crafts.
Wash and dry the acorns, give them a little scrub with an old tooth brush if they are really dirty. Spread them out on a baking sheet lined with parchment paper or foil and put them in the oven preheated to 200 degrees.Check on the acorns every thirty minutes and give them a little shake to keep them from getting to cooked on one side. If you do see some acorns getting over brown, turn the oven off and let the acorns continue to dry out for 1-2 hours, otherwise leave it on low and continue checking every thirty minutes for the same amount of time. Let the acorns cool before using. The same can be done with pinecones, but beware the sap which can get messy if it doesn’t all burn off. I myself, prefer to soak pinecones in a vinegar and water or bleach and water solution and then let them dry to kill off critters.
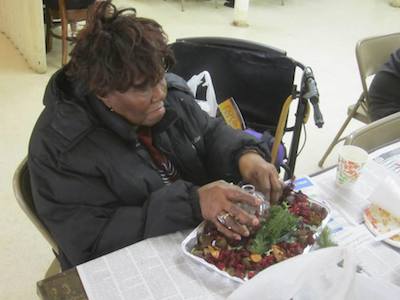
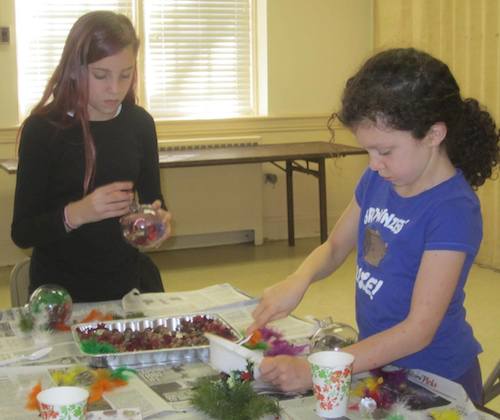
Once all of this prep is done, the fun begins! Our “Heaven and Nature Sing” ornaments took on a variety of forms depending on how artistically adventurous or able the crafters were–and this was perfectly fine. It’s important to remember that the end result is not just about beautifying the sanctuary tree, but about creating something together. Collaborative art projects, even simple ones like these ornaments, are a great way to get members of the congregation into a relaxed environment
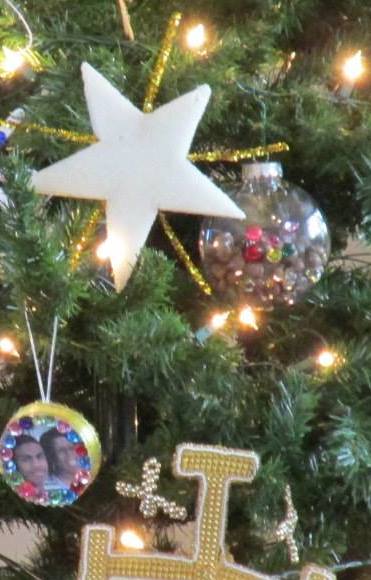
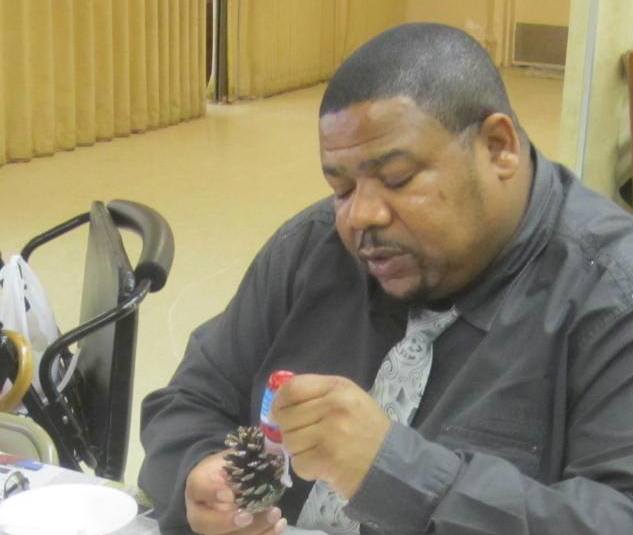
Some of the participants filled plastic ornament balls with acorns, glitter, dried petals, whatever inspired them. This technique was something that both our youngest members and our seniors found easy and enjoyable. Neurodiverse church members would also have little difficulty participating in this craft. I also photocopied some hymns and cut them into strips to represent the “Sing” element of our theme. Our crafters either tucked into the plastic balls or used ModgePodge to adhere to the outside of recycled ornament balls. We also used Modge Podge to glue sequins to pinecones. Again, the intended purpose was not uniformity but unity. Unity in materials and theme, but more importantly unity in Spirit. Ours was a diverse church, and I found a collaborative arts project like this a great way to bridge that diversity.
Our decorated sanctuary tree was an inspiring sight. Newly crafted decorations hung next to Chrismons created forty years earlier. It was a lovely symbol of the Body of Christ, and a worthy offering to celebrate the birth of Christ.


